Explore our expert-made templates & start with the right one for you.
Transforming and Loading Data into a Data Lake, Redshift, or Snowflake
Transform and Load Data in just a few Simple Steps
Upsolver SQLake makes it easy to ingest raw data from a variety of sources (such as Amazon S3, Apache Kafka, and Amazon Kinesis Data Streams) into an Amazon S3-based data lake as well a data warehouse (such as Snowflake and Amazon Redshift).
Because raw data is often denormalized when it is stored in the data lake, it must be transformed to make it useful. There are two primary ways to transform and load data:
- Extract, Load, and Transform (ELT), in which raw data from the data lake is loaded into the data warehouse, from where it is transformed and loaded into tables used to serve BI
- Extract, Transform, and Load (ETL), in which raw data from the data lake is prepared, transformed, and modeled before being loaded into the data warehouse to serve BI and other analytics use cases.
In this guide you will learn how to use SQLake to cost-effectively extract raw data, transform and model it, then load the modeled data into your warehouse, ready for consumption by data analysts.
Using SQLake to Transform and Load Data
This process consists of 5 straightforward steps:
- Create a connection to an S3 data source
- Create a connection to Snowflake or Redshift as the target for refined data
- Create a job to ingest raw data into a staging table
- Create the target Snowflake or Redshift tables
- Create a job to model and load results into Snowflake or Redshift
Let’s go through each of these in turn.
1. Create a connection to an S3 data source
Create a connection to the S3 source. For this exercise we’ll be using sample data provided by Upsolver. This example shows an S3 source, but you can connect to other sources as well.
CREATE S3 CONNECTION s3_conn
    AWS_ROLE = 'arn:aws:iam::949275490180:role/upsolver_samples_role'
    EXTERNAL_ID = 'SAMPLES'
    READ_ONLY = TRUE;
2. Create a connection to Snowflake or Redshift as the target for refined data
As with the previous step, you need to create a connection – this time to Snowflake. This connection holds the connection string and credentials to write data into Snowflake.
CREATE SNOWFLAKE CONNECTION sf_conn
       CONNECTION_STRING = 'jdbc:snowflake://<account>.<region>.aws.snowflakecomputing.com/?db=<dbname>'
       USER_NAME = '<username>'
       PASSWORD = '<password>';
Similarly, you can create a connection to your Amazon Redshift cluster, as follows:
CREATE REDSHIFT CONNECTION sf_conn
       CONNECTION_STRING = 'jdbc:redshift://<hostname>.<region>.redshift.amazonaws.com:5439/<dbname>'
       USER_NAME = '<username>'
       PASSWORD = '<password>';
Once created, the remaining steps are consistent between Snowflake and Redshift.
3. Create a job to ingest raw data into a staging table
Here you create a staging table in the data lake and an ingestion job that copies data from the source, optimizes the data, and stores it in the staging table.
The first step is to create the staging table.
CREATE TABLE default_glue_catalog.database_2777eb.orders_raw_staging
    PARTITIONED BY $event_date;
The second step is to create the ingestion job. This job reads files from upsolver-samples/orders/ and processes all events from the BEGINNING, instead of NOW; the latter would process only new incoming events.
CREATE SYNC JOB load_orders_raw
    START_FROM = BEGINNING
    DATE_PATTERN = 'yyyy/MM/dd/HH/mm'
    CONTENT_TYPE = JSON
    AS COPY FROM S3 s3_conn
      BUCKET = 'upsolver-samples'
      PREFIX = 'orders/'
    INTO default_glue_catalog.database_2777eb.orders_raw_staging;
After you create the job, give it a minute or two to process and load data. You should then be able to query it directly from SQLake. (Or you can use your favorite data lake query engine, such as Amazon Athena.)
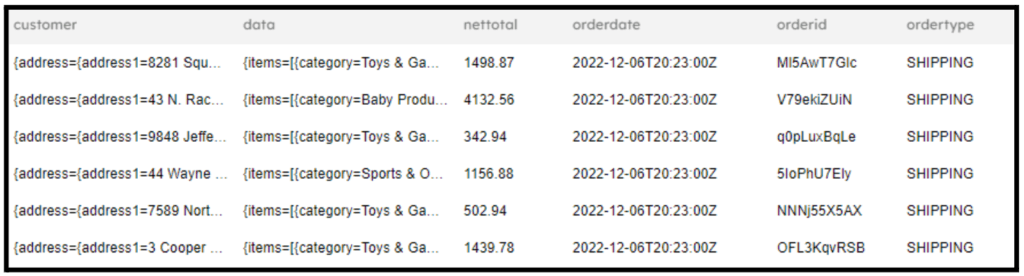
SELECT *
FROM default_glue_catalog.database_2777eb.orders_raw_staging
LIMIT 10;
Here is an example of the results when querying it from SQLake:
4. Create the target Snowflake or Redshift tables
Raw data is in JSON format and contains customer information, order information, and order item information, as shown above. Here, we want to extract customer information into the Snowflake Customer table, order information into the Snowflake Orders_Data table, and order items into the Order_Items table. Create the following three tables in Snowflake prior to proceeding with the next step:
Example SQL to create the given tables in Snowlake.
CREATE TABLE DEMO.CUSTOMERS (
        CUSTOMER_ID     VARCHAR,
        FIRST_NAME      VARCHAR,
        LAST_NAME       VARCHAR,
        ADDRESS_LINE1   VARCHAR,
        ADDRESS_LINE2   VARCHAR,
        CITY            VARCHAR,
        STATE           VARCHAR,
        ZIPCODE         VARCHAR
    );
CREATE TABLE DEMO.ORDERS_DATA (
        ORDER_ID VARCHAR,
        ORDER_DATE DATE,
        ORDER_TYPE VARCHAR,
        NET_TOTAL FLOAT,
        TAX_RATE FLOAT,
        CUSTOMER_ID VARCHAR
);
CREATE TABLE DEMO.ORDER_ITEMS (
        ITEM_ID INT,
        ORDER_ID VARCHAR,
        ITEM_NAME VARCHAR,
        ITEM_CATEGORY VARCHAR,
        ITEM_PRICE FLOAT,
        ITEM_QTY  INT
);
Once you’ve created the tables in Snowflake, navigate back to the SQLake console and proceed with the next step.
5. Create a job to model and load results into Snowflake or Redshift
With SQLake you can model your data in the data lake and then load the results into a target table residing in Snowflake, Redshift, or the data lake. When you have loaded the target tables. they are ready for users to consume.
Note that the following jobs perform an append-only insert operation on the target Snowflake tables. If instead you wish for records to be upserted you must use a MERGE operation.
In this step, you’ll create three jobs – one for each table.
First, create a job to transform and model the customer information. You would want to flatten the nested customer data structure and rename some of the columns to fit your target schema. Note that this is an append-only table; it will include duplicate customer order records. If you wish to upsert records and eliminate duplicates, follow the instructions in <LINK>Using primary keys to insert, update, and delete rows in data lake tables<LINK>.
CREATE SYNC JOB load_customers
       RUN_INTERVAL = 1 MINUTE
       START_FROM = BEGINNING
    AS INSERT INTO SNOWFLAKE "SnowFlake Connection"."DEMO"."CUSTOMERS"
    MAP_COLUMNS_BY_NAME
    SELECT
       customer.email            AS CUSTOMER_ID,
       customer.firstname        AS FIRST_NAME,
       customer.lastname         AS LAST_NAME,
       customer.address.address1 AS ADDRESS_LINE1,
       customer.address.address2 AS ADDRESS_LINE2,
       customer.address.city     AS CITY,
       customer.address.state    AS STATE,
       customer.address.postcode AS ZIPCODE
    FROM default_glue_catalog.database_2777eb.orders_raw_staging
    WHERE $event_time BETWEEN run_start_time() AND run_end_time();
Next, create a job to transform and model the order information.
CREATE SYNC JOB load_orders_data
       RUN_INTERVAL = 1 MINUTE
       START_FROM = BEGINNING
    AS INSERT INTO SNOWFLAKE "SnowFlake Connection"."DEMO"."ORDERS_DATA"
    MAP_COLUMNS_BY_NAME
    SELECT
       Orderid                               AS ORDER_ID,
       extract_timestamp(orderdate::STRING)  AS ORDER_DATE,
       ordertype                             AS ORDER_TYPE,
       nettotal                              AS NET_TOTAL,
       taxrate                               AS TAX_RATE,
       customer.email                        AS CUSTOMER_ID
    FROM default_glue_catalog.database_2777eb.orders_raw_staging
    WHERE $event_time BETWEEN run_start_time() AND run_end_time();
Lastly, create a job to transform and model the order items. In this case, the items field is an array inside the data structure. SQLake makes it simple to access nested elements, especially within arrays. To do that, use the array notation [ ]. Furthermore, use the UNNEST keyword, which instructs SQLake to explode the array elements into rows so they can be accessed.
CREATE SYNC JOB load_items
       RUN_INTERVAL = 1 MINUTE
       START_FROM = BEGINNING
    AS INSERT INTO SNOWFLAKE "SnowFlake Connection"."DEMO"."ORDER_ITEMS"
    MAP_COLUMNS_BY_NAME
    UNNEST(
       SELECT
         data.items[].itemid             AS ITEM_ID,
         orderid                         AS ORDER_ID,
         data.items[].name               AS ITEM_NAME,
         data.items[].category           AS ITEM_CATEGORY,
         data.items[].unitprice          AS ITEM_PRICE,
         data.items[].quantity           AS ITEM_QTY
       FROM default_glue_catalog.database_2777eb.orders_raw_staging
       WHERE $event_time BETWEEN run_start_time() AND run_end_time()
    );
Summary
SQLake enables you to create a pipeline to copy data from source streams, databases, and object stores into data lake tables for staging. You can then easily model and transform this data in the data lake before loading the results into your Snowflake or Redshift data warehouses for analysis and BI. This in turn enables you to keep transformation and modeling logic in a central place, and reduce the cost of continuously transforming data in your data warehouse. SQLake automatically scales up and down compute resources to match the velocity and volume of your data.
Get started today for free with sample data or bring your own.
Discover how companies like yours use Upsolver
Data preparation for Amazon Athena.
Browsi replaced Spark, Lambda, and EMR with Upsolver’s self-service data integration.
Read case studyBuilding a multi-purpose data lake.
ironSource operationalizes petabyte-scale streaming data.
Read case studyDatabase replication and CDC.
Peer39 chose Upsolver over Databricks to migrate from Netezza to the Cloud.
Read case studyReal-time machine learning.
Bigabid chose Upsolver Lookup Tables over Redis and DynamoDB for low-latency data serving.
Read case study
Start for free - No credit card required
Batch and streaming pipelines.
Accelerate data lake queries
Real-time ETL for cloud data warehouse
Build real-time data products