Explore our expert-made templates & start with the right one for you.
Using Upsolver to index less data into Splunk
August 4, 2020
Before we start, you must have already deployed Upsolver and created data sources. Try Upsolver for FREE.
Many users are looking for ways to reduce their Splunk cost. This guide provides an example of how to index less data into Splunk.
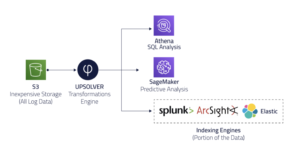
Upsolver architecture for various data structures
The Upsolver architecture liberates your data from vendor lock-in. It allows many ways to analyze data, including SQL engine, Machine Learning and Searching. Many Upsolver users utilize Athena to run SQL on log data.
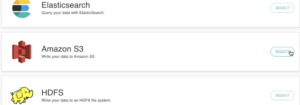
Create an Amazon S3 data output
1. Click on OUTPUTS on the left and then NEW on the right upper corner.
2. SELECT Amazon S3 as your data output.
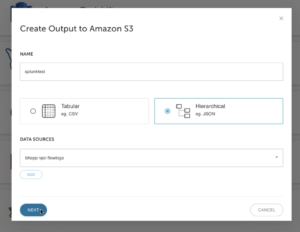
3. Give the data output a NAME and define your output format. Fill out your DATA SOURCES information. Click on NEXT to continue. (If you haven’t created a Data Source, follow this guide to create one) Keep in mind that you can infer data types when you define your DATA SOURCES.) This guide uses AWS VPC Flow Logs.
Use the UI or SQL to aggregate data before sending to Splunk
1. Select the SQL window from the upper right hand corner. Keep in mind that everything that you do on the UI will be reflected in SQL and vice versa.
2. The sample SQL aggregates multiple values together for a given period of time. Reducing the amount of data being sent to Splunk.
SELECT data.”account-id” AS ACCOUNT_ID,data.action AS action,SUM(TO_NUMBER(data.bytes)) AS SUM_BYTES,SUM(TO_NUMBER(data.packets)) AS SUM_PACKETS,COUNT(*) AS “count”FROM “bhopp-vpc-flowlogs”GROUP BY data.”account-id”,data.action
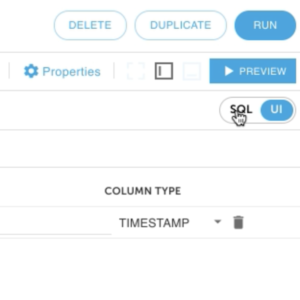
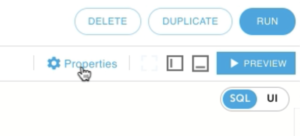
3. Click on Properties on the upper right hand corner.
4. Under Scheduling, change the Output Interval to your desired length. This property defines how frequently Upsolver outputs the aggregated data. The default is 1 minute.

5. Click on RUN on the upper right hand corner.
Define Amazon S3 output parameters
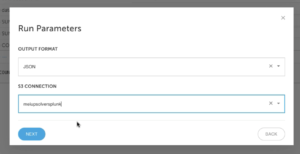
- Define the OUTPUT FORMAT and S3 CONNECTION information and click on NEXT. Keep in mind that Upsolver supports all file types.
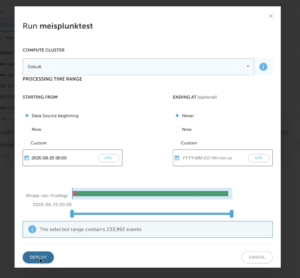
2. Define the compute cluster that you would like to use and the time range of the data you would like to output. Keep in mind that setting ENDING AT to Never means it’s a continuous stream. Click on DEPLOY.
Define Amazon S3 output parameters Configure Splunk environment to read data from S3
1. While waiting for the data writing to the output, configure the Splunk environment to read from S3. If you don’t have a Splunk environment, you can easily start up a Splunk instance in the same environment Upsolver is deployed. This guide uses a size t2.large instance. After logging in, click on Find More Apps.
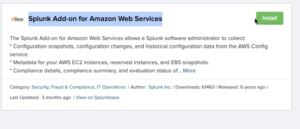
2. Find the Splunk Add-on for Amazon Web Services app and click on Install.
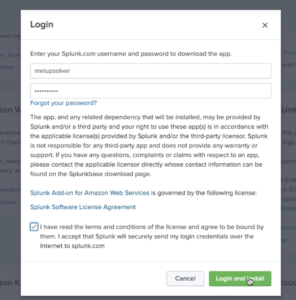
3. Fill out your login information for Splunk.com. If you don’t have an account, click on FREE SPLUNK on the upper right hand corner and signup for a free account. Check on the license and agreement box. Click on Login and Install.
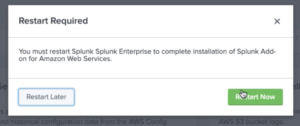
2. The installation might take a few seconds and Splunk will prompt you to restart. Click on Restart Now.
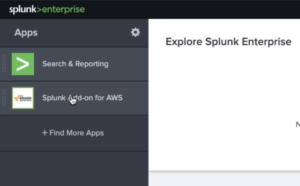
3. Login to your Splunk environment again and click on the Splunk Enterprise logo. Then click on Splunk Add-on for AWS.
4. Click on the Configuration tab and then Add on the right.

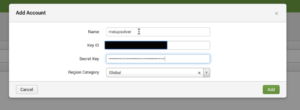
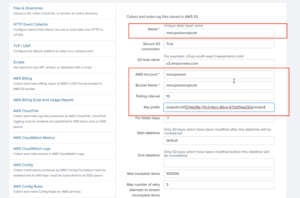
5. Give your Account a name (make sure to remember this name, we will use it for the data input next) Fill out your AWS Access Key (Key ID) and Secret Key information. Click on Add.
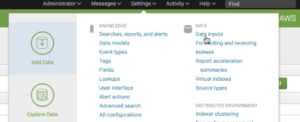
6. Click on Settings and Data inputs on your Splunk UI’s upper right hand corner.
7. Find and click on AWS S3 data input (most likely on page 2).

8. Give the Data input a Name. Also fill out your AWS Account information. It’s the same Account Name from step 5. Give it a Bucket Name. It has to match the bucket name on your AWS account the output data is being stored. See Step 1 (S3 Connection) from Define Amazon S3 output parameters. Change the Polling interval to 10. Define Key prefix as your S3 folder path.
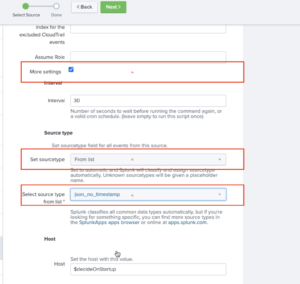
9. Scroll down and check More settings. This will provide you with additional options for settings. Change Set sourcetype to From list. From the Select sourcetype from list dropdown, select json_no_timestamp. Click on Next on the top.
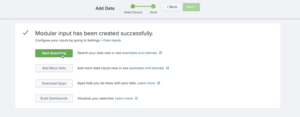
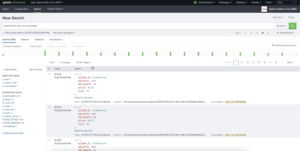
10. Click on Start searching
Verify data in Splunk
1. Click on Data Summary under What to Search.
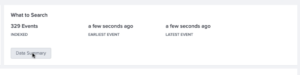
2. Click on Sourcetype and json_no_timestamp.
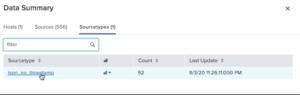
3. Verify your indexed data is the same as the aggregated data from Upsolver. Success!
What’s next?
Use Upsolver to load CDC data to Snowflake.